Images and photography represent a powerful communication medium allowing friends and families a way of connecting and richly expressing themselves. Unfortunately, sometimes that “really good smile” or “pose” doesn’t say want we want because the captured image doesn’t represent the scene the way we saw or felt it.
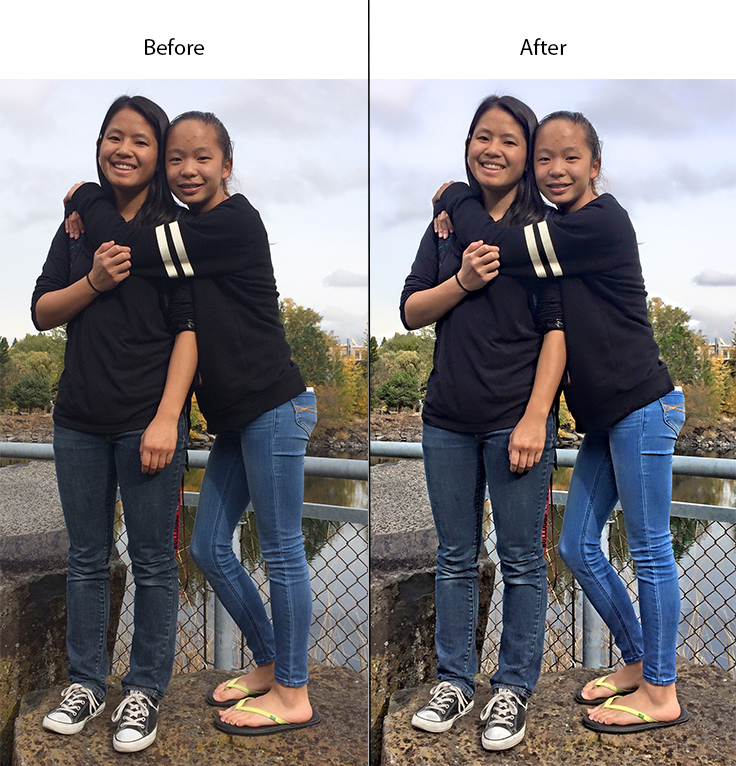
Here’s an example of the problem: Recently, I took a quick snapshot of my daughters. The picture was good but I wanted the image to be a bit bolder and brighter. I wanted to capture the drama of the background clouds and make the girls’ faces shine a bit more. That was how I remembered the moment. So I decided to run it through the auto-enhance filter our teams built — it’s a feature that allows you to correct the image on the fly. The results were what I hoped; the scene came to life representing things just a bit more like how I had remember the scene.
Our engineering team took on quite a challenge to build the auto-enhance filter and ultimately get this result. Let’s dig into how we built this tool.
Light, image memory, and real scenes
Creating a software solution that helps people capture images as vibrant as the moment itself required breaking down what it means to shoot images as we saw them. There are three main reasons images captured with your phone look different than they do in real life.
First, a digital camera doesn’t capture as much light information about the scene as your eyes do. The scene or real life image often contains a very wide dynamic range of light from 10 Lux (dark bar scene) to 100,000 Lux (bright outdoor scene). This represents a 80db dynamic range whereas most smart phone cameras deliver around 9.25 bits or 55db of dynamic range – much less than we see. The net result is that digital images appear somewhat flat and not as vibrant and tonally rich as the real world.
Second, the human visual system dynamically adapts to the huge swings in dynamic range through a process of “image memory” and physiological adaptations (e.g. your iris getting bigger and smaller depending on the scene and where you look). Pragmatically this means you can see something in shadow and bright light when both are in the same scene. Even though your eye is adapting as you move your eye around, you remember the whole scene as if it was evenly lit.
Third, the world is a noisy place. I don’t mean loud, but the light itself and the sensors collecting the light can generate “noise” or pixelation on an image. Light gathering CMOS sensors are inherently noisy especially in low light scenarios. Fascinatingly, it is one of the few places where the strange world of quantum mechanics impinges on our daily life. Photons are emitted randomly from light sources and thus reach us with a certain amount of randomness. Our visual system, which accumulates a mental image of the scene, effectively removes much of our perception of this noise allowing our brain to amplify the image free of noise. Not only does light arrive randomly at the silicon sensor, but the sensor itself adds noise as it turns photons into electrons and amplifies the signal. This conversion process is also confounded by quantum uncertainty and thus is somewhat random. Unfortunately, the digital sensor captures all of this noise and conflicts with our sense of the scene.
Learning from the masters
At first blush it seems like an intractable problem: How do we recover light in the dynamic range missed by the camera to create a noise-free image? It turns out this is an age-old problem in photography that confronted the 20th century masters such as Ansel Adams and Ernst Haas. Photographic film and paper also had these same problems, arguably to a greater degree. The masters evolved a set of darkroom techniques that managed local and global tone through the use of dodging-and-burning techniques along with chemical recipes and various colored filters. These techniques required a huge amount of time to execute and years to master. Later, in the digital age, desktop tools followed suit providing similar techniques in the digital domain. While not quite as time consuming, it still required a level of mastery and patience that inhibited all but most avid enthusiasts and professionals.
Computational Imaging
Our approach was to adapt ideas from the masters and figure out automated algorithms – collectively known as computational imaging – that would apply these techniques in the right amount and the right time. We developed three computational imaging technologies drawn directly from these historical techniques: adaptive Global Tone Mapping (GTM), Local Tone Mapping (LTM), and Noise Suppression (NS). Applied together, these manage the dynamic range in the way our visual system remembers them and the way in which the 20th century masters brought images to life.
Global Tone Mapping (GTM)
GTM is merely a mapping of input pixel values to output values. GTMs are well known – for instance, the sRGB gamma curve is a type of GTM. It’s one that compands the image space — or reduces the signal-to-noise ratio — from say 10 bits to 8 bits. There are others that are commonly used to stretch the overall contrast of the image: pushing dark values towards black and bright values towards white. However, blindly applying such GTMs is not always desirable or how most professional image makers perform this task. Rather, we developed an algorithm that analyzes each image independently and creates a tone curve that brings up shadows and controls highlights so that the overall tone of the scene is retained. This mimics the visual system’s ability to handle dynamic range and better matches our image memory.
Local Tone Mapping (LTM)
We follow this with a LTM which is similar to the aforementioned dodging-and-burning technique. Here, we adapt the local contrast and tone of the image. Unlike the traditional LTM techniques, we use an edge-aware dodge-and-burn mask to prevent the haloing effect near sharp edges. The basic idea is to use a mask that represents the local tone and then to adaptively contrast stretch the image around the local tone. This further mimics the human visual system’s ability to local boost the photographic detail — rendering the image more like we saw and remembered it.
Noise Suppression (NS)
As we boost and control global and local contrast, the inherent noise in the image is also boosted, so we apply a noise mask that avoids boosting the noise in regions where noise dominates local detail and elements in the image. This effectively smooths out flat regions where noise is most noticeable.
Each technique is applied to every image differently based on the content of the image itself, lending the image a richness that more closely models the way we saw the moment. And, in this case, the tool brings to life the brightness on my daughters’ faces I fondly remember.
You can use the auto-enhance filter on iOS now. Check the settings to control the strength or turn it on and off. We hope you enjoy the new tool.